Twitter Updates

    follow me on Twitter

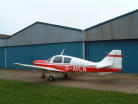
    G-AVLN in front of her home

    G-AVLN in front of her home

    Mostly Unix and Linux topics. But flying might get a mention too.

    Monday, October 29, 2007

    Re-installing Dell XPS M1330 (Part 4)

    Well, the machine is ready for Linux. I have preserved the original software by installing it in a much smaller partition, allowing most disk space to be left for Linux.

    Obtain installable Ubuntu CD-ROM
    ------------------------------------------------
    Well, the system is ready for Linux installation. One little detail first - need to get the Linux software itself. I decided to go for the highly recommended Ubuntu, after the less than successful attempt with CentOS. No time to order a ready made CD or DVD, so need to download the ISO image (onto an XP box) and burn the CD disk. One reason for the choice is that this is the distribution that Dell use when pre-installing their machines with Linux.

    1. Download Ubuntu 7.10 Gutsy Gibbon (ISO image).

    There are numerous sites that will sell disks with the image on it. But if you have a decent bandwidth, it's cheaper to download your own. My bandwidth is useless, but it was still quicker than ordering disks and waiting for delivery.
    I got the image from: http://www.ubuntu.com/getubuntu/download. It took nearly 3 hours for the 712MB image (ubuntu-7.10-desktop-i386.iso) to land on my Desktop.

    2. Download ISO file burning software (unless you already have it)

    Many commercial programs exist. I used a freeware program: ISO Recorder v2 from http://isorecorder.alexfeinman.com/isorecorder.htm. Once the ISO Recorder is installed, "Copy image to CD" option will appear when you right-click in the ISO file.

    3. Having inserted empty CD in the drive, locate the ISO file you have downloaded, right-click it, and select the "Copy image to CD" option. Follow the steps - it will take few minutes for the new disk to be written.

    Boot from the Ubuntu CD and install it on hard disk
    --------------------------------------------------------------------
    Select "Start or install Ubuntu". Watch the little orange bar for a couple of minutes, then a blank screen for a minute or so, eventually Ubuntu starts the services. This will initially start Ubuntu as Live CD (i.e. run directly off the CD). Linux is at that point in memory (and using the CD). However, we will use this to install Ubuntu permanently into the spare partition on the hard disk.

    Double-click the Install icon, to start Install program.

    Welcome screen - press "Forward" (notice default is English)

    Where are you? - Use the map to locate a city in your timezone (London for me).

    Time zone is shown as BST (GMT+1:00) - press "Forward"

    Keyboard layout - press "Forward" (unless you are not in the UK, in which case change it! )

    Prepare disk space - select "Manual" (see Note 1 below for the rationale of my partition layout that I am suggesting) - press "Forward"

    Prepare partitions - on my machine, the current layout showed:

    Device Type ... Size Used
    /dev/sda
    /dev/sda1 fat16 ... 49 MB 33 MB
    /dev/sda2 ntfs ... 42952 MB 14700 MB
    /dev/sda5 154890 MB unknown
    /dev/sda6 fat32 ... 2154 MB 50 MB

    Highlight /dev/sda5 and press "Delete partition" - it should now show as "free space"

    Highlight the "free space" line and press "New partition".
    Fill the form with: - 150 MB ext3 /boot

    Highlight the "free space" line and press "New partition".
    Fill the form with: - 2000 swap

    Highlight the "free space" line and press "New partition".
    Fill the form with: - 5000 MB ext3 /

    Highlight the "free space" line and press "New partition".
    Fill the form with: - 10000 MB ext3 /home

    Highlight the "free space" line and press "New partition".
    Fill the form with: -10000 MB ext3 /usr

    Highlight the "free space" line and press "New partition".
    Fill the form with: - 1000 MB ext3 /var

    Highlight the "free space" line and press "New partition".
    Fill the form with: - 850 MB ext3 /tmp

    Highlight the "free space" line and press "New partition".
    Fill the form with: - 2500 MB ext3 /spare1

    Highlight the "free space" line and press "New partition".
    Fill the form with: - 2500 MB ext3 /spare2

    Press "Finish", then "Ignore" (if you got it, see Note 2 below)

    Migrate Docs and Settings - press "Forward"

    Who are you? - fill in the form; press "Forward"

    Ready to install

    Note 1.
    I never trust automatic partitioning tools - they never seem to split the disk in a sensible way.I want to share files with Windows, hence fat32 partition.

    I'm of a traditional UNIX school, where a separate partition is used for just about anything ;-). I always have at least one spare partition, for rescuing data from broken partitions, experimenting, trying new or experimental filesystem types, etc.

    This time I've ended up with 2 spare partitions, because one of them was going to be vfat type. This didn't work (see Note 2), but I will try changing the type later on, once the system is up and running.

    Note 2.
    Issues I had during the install:

    When partitioning, after creating all partitions I wanted, I have then selected the rest of the disk and assigned the "don’t_use" filesystem type. What a mistake - the process crashed. Waited a long time hoping that the little timer indicating that something is happening would time out and allow me to continue. Nope. Had to cancel the whole procedure and start from scratch (all the way from double-clicking in the Install icon). Second time round tried fat16 instead of fat32. Same problem. Tried to "Ignore" it, but when the actual partitioning started, got a new message:

    "Failed to create a file system: The fat 16 file system creation in partition #4 of SCSI1 (0,0,0) (sda) failed. Press "OK".

    This put me back into the partitioner (but I had to select "Manual" again. However, at least the partition information was remembered. Just had to go through each one and allocate type and mount point. At this point, I have also given up on the fat partition, and set it to free space (by deleting it).

    Once the complete partitioning process, you need to press "Finish". At this point, the Warning message popped:

    "File system doesn't have expected sizes for Windows to like it. Cluster size is 2k (expected 1k); number of clusters is 24026 (47959 expected); size of FATs is 94 sectors (188 expected). I chose to ignore this message and pressed "Ignore".
    Re-installing Dell XPS M1330 (Part 3)

    Using Dell MediaDirect (TM) 3.3 to partition disk
    --------------------------------------------------
    Before I move on, I need to give credit to another blogger, who published a quick howto about installing M1330 with dual boot configuration: (http://linuxevangelist.blogspot.com/2007/10/dual-boot-in-dell-xps-m1330-with.html). Without his information, it would've taken me a lot longer to realise that the MediaDirect disk is more than an application. It is a bootable CD, and is important for partitioning and making sure that Vista would be able to make use of the various media buttons the M1330 has (at this point I'm not sure if Linux will be able to use them ).

    Installing Vista
    --------------------------------------------------
    Put Vista disk in the drive and restart the box. Follow the few simple instructions. No problem with the install, except I had to insert the disk several times before it started - I hope I don't have an inherent CD or drive problem! A quick reboot into Vista to confirm it worked - it did, after a fashion. What surprised me is, though, it started into 800x600 resolution! A quick adjustment (Start --> Control Panel --> Appearance and Personalization: Adjust Screen Resolution) and slide the resolution to 1280x800.

    Worked fine, but I thought Windows do these things automatically. Hmmm.

    Installing Drivers and Utilities (grey Driver and Utilities disk)
    ---------------------------------------------------------------------------
    Insert the Drivers and Utilities CD disk in the drive. Select "Run..." in the AutoPlay pop up screen. Say "OK" to start. On my machine, the virus wizard showed a warning: "An unidentified program wants access to your computer". Not really knowing what it's about, I can only assume that driver setup.exe is regarded as potential virus. So, selected "Allow". A couple of more "OK" clicks and 30 seconds later the Dell Resource Disk printed a Welcome message with hardware, drivers and hardware utilities being displayed. Close this screen, and you will find that behind it the install wizard is waiting for you to press "Finish". Do that. Eject the disk (with the eject touch key above the main keyboard).

    Installing Dell Webcam Manager (blue Driver and Utilities disk)
    ------------------------------------------------------------------------------
    Insert the Drivers and Utilities CD disk in the drive. Select "Run..." in the pop up screen. Scroll to the bottom of the licence text and press "Yes" to accept the licence. Unless you have a good reason to change the default destination for the drivers to go to, accept the default location: c:\Program Files\DELL. Select the "Full Installation".

    The "Dell Webcam Software" screen will be displayed, and this stage of the installation should take not more that 5 minutes.

    Allow the laptop to restart (default action on "Finish"). The CD will be automatically ejected, and the machine will reboot.

    Installing Dell MediaDirect(TM) 3,3
    --------------------------------------------------
    Insert the Drivers and Utilities CD disk in the drive. Select "Run..." in the AutoPlay pop up screen. Say

    Another warning from the virus - press "Allow" again, Then "Enter" to start installation. First time round the disk got stuck again (you know when it happens, because it starts making repeatable noises). Had to eject the disk and restart the process. Not happy about it!

    But eventually it all worked, and MediaDirect installed itself in a separate partition. Another reboot to confirm it's all installed and working from Windows perspective. Vista booted fine, all touch keys work OK (although I haven't really played any media with it - can't wait to put Linux on and see how it can handle the same hardware).

    So, the next step is to obtain Linux - this time I'll go for Ubuntu - and install it in the free space.


    Friday, October 26, 2007

    Re-installing Dell XPS M1330 (Part 2)

    I only need Vista for MS for a few applications used at work. Other than that, everything I need can be done by Linux.

    Also, I don't want *all* applications installed by default, so I had to start from scratch. As every self-righteous know-it-all techie, I threw the Vista install disk in, to re-install, clean up the disk and repartition it in the process.

    Allowing your M1330 to boot from DVD
    --------------------------------------------------
    First little hiccup that surprised me was that CD/DVD is after hard disk in the BIOS booting sequence.

    Not a problem: reboot the system, hit F2 as soon as the first Dell screen appears and locate under "System" the "Bootable Sequence" menu item. Scroll down to it, press <Enter>. Now, with the list of available bootable devices displayed, reshuffle them to have HDD after DVD. Nice to see that booting from a USB device is available: reassuring if not surprising.

    There is some help at the bottom of the BIOS setup screen. I couldn't get how to actually move the entry. If up/down arrow keys are described as Up/Down arrows (to select the line), what could U/D mean (to move the entry)? Well, trial and error proved that U/D means Shift-Up or Shift-Down arrows. Obvious !?

    My preferred sequence would be:

    1. CD/DVD/CD-RW Drive
    2. USB Storage Device
    3. Internal HDD

    That's for my personal use - security consideration may dictate different approach (not a good idea to allow booting from removable media in a commercial environment).

    Once you have the correct sequence, do ESCAPE, then choose Save/Exit and Enter. That will accept your new setting and continue booting the system.

    During my first attempt, I have followed this with a fresh install of CentOS 5. It kind of worked, however, no sound, Ethernet or wireless were recognised. Screen required adjustments, but was fine after that. However, on reboot, although Vista was shown (as "other"), it wouldn't boot - missing MBR!

    Not very worried about any of this - I never expect my first install to work. But I decided to take a step back, and rethink my approach. A bit of googling didn't go amiss. There was a very useful blog entry from a chap who tried to achieve a similar configuration, and I took his advice. More in the next part...

    Re-installing Dell XPS M1330 (Part 1)

    I have invested a few pounds ;-) into a gorgeous toy. I want to start playing with applications that require a dual core processor, have a bit more memory and disk. For one thing, I will be investigating virtualisation, first step: ESX from VMWare, now that we are the authorised training place for them. If anything, I need to understand exactly the Linux portion of the product (Linux for ESX administrators course will follow soon).

    This is a great excuse to have a box with the spec:

    System Info:
    ---------------------------
    System: XPS M1330
    BIOS version: A06 (09/03/2007)

    Processor Type: Intel(R) Core(TM)2 Duo processor
    Max. Clock Speed: 2.2 GHz
    Processor Cache: 4096 KB
    Dual Core Present: Yes

    Memory Info
    ---------------------------
    Installed: 4096 MB
    Speed: 667 MHz
    Channel Mode: Dual
    Technology: DDR2 SDRAM
    Device Info
    ---------------------------
    Primary Hard Drive: 200 GB HDD
    Video Memory: 128 MB
    Panel Type: 13.3" Wide XGA
    Native Resolution: 1280 by 800

    It's got all sorts of other bits and pieces, WIFI, bluetooth - of course, fingerprint recognition, camera, and a product called MediaDirect, which I haven't yet sussed out.

    My first task is to reinstall it. I want a minimal install of the Vista the box came with, and Linux, which will take over most of the tasks. First quick reinstall has proven that RedHat derivatives couldn't cope. Very few devices were recognised with CentOS 5 or Fedora 6. So I decided to give the highly recommended Ubuntu 7.10 Gutsy.

    Well, I'm in business, incredibly impressed with Ubuntu. I am documenting every step of my attempts, and will be posting them in turn, as things progress.

    The next post will cover the partitioning and preparing for Ubuntu install without losing any facilities and drivers used by Vista.


    Wednesday, October 24, 2007

    An example of using eval

    When learning (or teaching) eval, the first - and very valuable - example of it is to see eval's ability to evaluate the value of the last positional parameter:

    $ set a b c d

    $ eval print -- \$$#

    d


    We use eval it to force the shell to perform a double scan, when we need to find a value of a value. First scan will evaluate the $# to the number of available parameters (in this case: 4); the second scan will check the value of it (d). This is 'bread and butter' of eval application.

    Other cases of using eval are a bit more obscure, and for that reason eval is often forgotten...

    Here is an example that is not 'that' obscure - and possible quite useful. A delegate wanted to rename all files in a given directory, to change the character case from lower to upper. What he devised, successfully, is as follows:

    for file in *

    do

    mv $file $(echo $file | tr '[a-z]' '[A-Z]')

    done


    This worked, until he found that some of the files contained 'unfriendly' characters: spaces. The script failed to cope with this.

    This is where eval stepped in:

    for file in *

    do

    eval mv '"$file"' \"$(echo "$file" | tr '[a-z]' '[A-Z]' )\"


    done

    In this case eval allows to insert an additional set of double quotes, which protected spaces embedded in file names.

    Wednesday, October 17, 2007

    ksh93 - test, test and then test a bit more

    Since ksh93 is now [1] available for most version of UNIX (and Linux), we have been tentatively moving our courses (especially scripting) towards the new syntax. At the moment the scripting course is still based predominantly on the pre-93 versions, but we now introduce a fair amount of comparisons, 'gotchas' and demos of new capabilities and syntax.

    Truth is, months later we still find new idiosyncrasies.

    Here is one I found today, whilst teaching... Imagine the following example, to illustrate the need for double quotes when creating and accessing variables:

    If you want to assign a value that has leading or trailing spaces or tabs, you need the quotes:

    $ address=" 6 Pie Corner"

    Would you expect to see the leading spaces if you didn't use the quotes when accessing the variable? Of course not! Well, in ksh93 it works! Haven't checked yet if this behaviour is driven by any particular setting or switch, but in my CentOS 5 ksh (Version M 1993-12-28 r), the following worked out of the box:

    $ print -- $address

    <space><space>6 Pie Corner


    [1] in the original posting this said 'not' - corrected 18/10/2007

    Monday, October 15, 2007

    No access to ntp source?

    When you install Linux on a PC, you may find that the hardware clock enforced the time. Normally, you would use the ntpd (network time protocol daemon) to synchronise the system (software) time with a selection of external sources.

    However, what if you are not connected, or for some reason just don't have access to time servers (for example the ntpd port 123 is blocked)?

    Well, unless you need to maintain a precise time (in which case you still need to find access to a reliable source), you can just use the good old date command and inform the hardware clock of the change.

    # date --utc 101517052007.00

    will update the system (software) clock and set the current time and date to: Oct 15 18:05:00 BST 2007.

    The only problem is that system clock doesn't run when your machine is powered off. What does continue to run is the hardware clock. It ticks forever. External power present or not. Because on start-up the hardware clock is used, you need to flush the system date into the hardware clock, and as long as the hardware clock is accurate enough, your newly adjusted time will be persistent over reboots.

    Use the hwclock tool to achieve this:

    # hwclock --systohc

    Do remember, though: this is 'quick and dirty'. If you require consistent and accurate time keeping, you need to synchronise the system clock with an external source...

    Blog Archive